“安装和配置 VPN 泼妇-Linux”的版本间的差异
| 第1行: | 第1行: | ||
| + | <span data-link_translate_es_title="Instalación y configuración de VPN musaraña - Linux" data-link_translate_es_url="Instalaci%C3%B3n+y+configuraci%C3%B3n+de+VPN+musara%C3%B1a+-+Linux"></span>[[:es:Instalación y configuración de VPN musaraña - Linux]][[es:Instalación y configuración de VPN musaraña - Linux]] | ||
<span data-link_translate_en_title="Installing and configuring Shrew VPN - Linux" data-link_translate_en_url="Installing+and+configuring+Shrew+VPN+-+Linux"></span>[[:en:Installing and configuring Shrew VPN - Linux]][[en:Installing and configuring Shrew VPN - Linux]] | <span data-link_translate_en_title="Installing and configuring Shrew VPN - Linux" data-link_translate_en_url="Installing+and+configuring+Shrew+VPN+-+Linux"></span>[[:en:Installing and configuring Shrew VPN - Linux]][[en:Installing and configuring Shrew VPN - Linux]] | ||
<span data-link_translate_fr_title="Installation et configuration Shrew VPN - Linux" data-link_translate_fr_url="Installation_et_configuration_Shrew_VPN_-_Linux"></span>[[:fr:Installation et configuration Shrew VPN - Linux]][[fr:Installation et configuration Shrew VPN - Linux]] | <span data-link_translate_fr_title="Installation et configuration Shrew VPN - Linux" data-link_translate_fr_url="Installation_et_configuration_Shrew_VPN_-_Linux"></span>[[:fr:Installation et configuration Shrew VPN - Linux]][[fr:Installation et configuration Shrew VPN - Linux]] | ||
2016年2月19日 (五) 03:09的版本
es:Instalación y configuración de VPN musaraña - Linux
en:Installing and configuring Shrew VPN - Linux
fr:Installation et configuration Shrew VPN - Linux
这篇文章是从由软件进行自动翻译。你可以看到这篇文章的源代码
介绍
ShrewSoft VPN 客户端的安装和配置 (Ubuntu 14.04 和 Debian 7)对于远程 VPN 连接 Ipsec.
地方
软件包下载 [1] 在正式 (2.2.1 在这篇文章创建时间 )
在我们的例子中我们将在上传 /var/tmp
cd /var/tmp
wget https://www.shrew.net/download/ike/ike-2.2.1-release.tgz
解压包下载
tar -zxvf ike-2.2.1-release.tgz
ShrewSoft 所需的依赖项安装
apt-get install cmake libqt4-core libqt4-dev libqt4-gui libedit-dev libssl-dev checkinstall flex bison
建造和安装的文件
 cd /var/tmp/ike
cmake -DCMAKE_INSTALL_PREFIX=/usr -DQTGUI=YES -DETCDIR=/etc -DNATT=YES
安装应用程序
checkinstall -y
创建配置文件
cp /var/tmp/ike/source/iked/iked.conf.sample /etc/iked.conf
Ike 守护进程开始
iked
GUI 使用 ShrewSoft 启动
qikea
ShrewSoft VPN 客户端配置
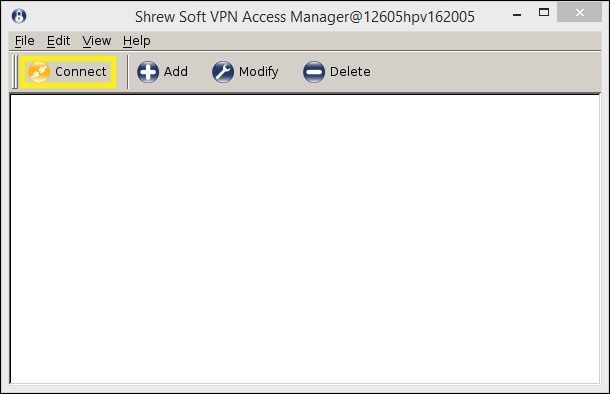
通过 qikea 命令发起的图形 ShrewSoft VPN 接口。
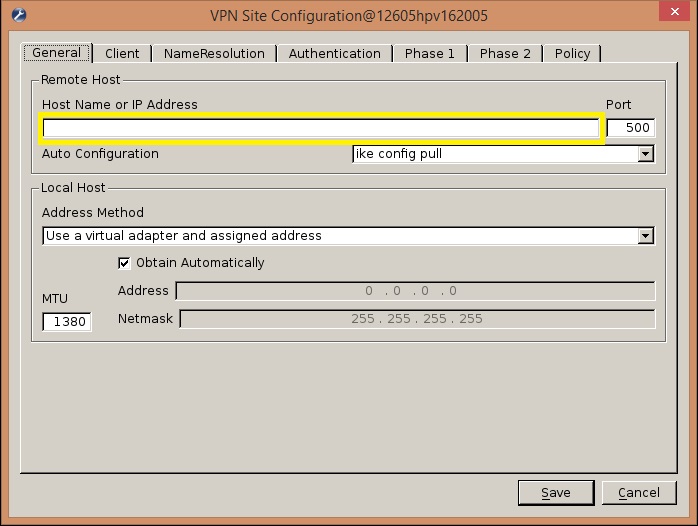
选项卡 "一般 "
填补 "主机名或 IP 地址 " 来自您的防火墙的信息。
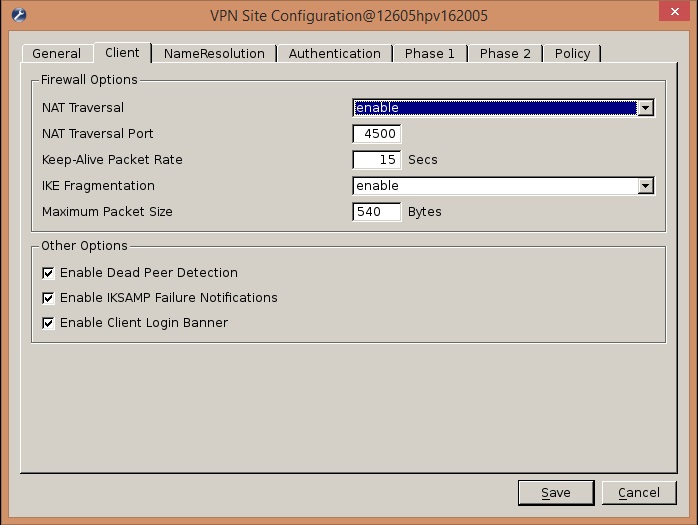
选项卡 "客户端 "
保留默认值。
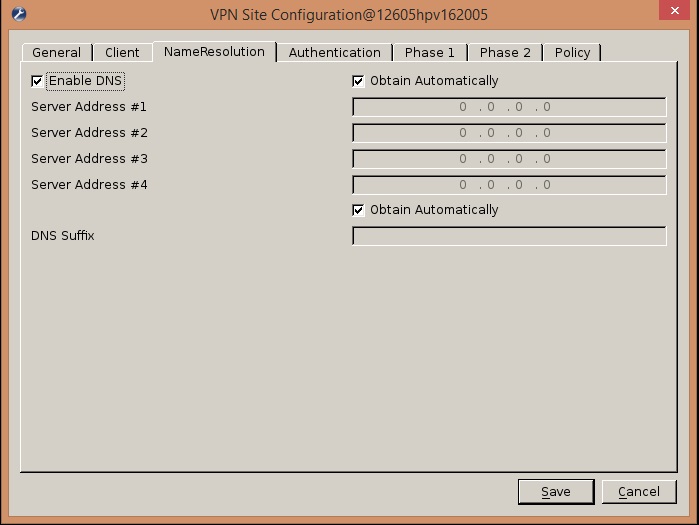
选项卡 "NameResolution "
保留默认值。
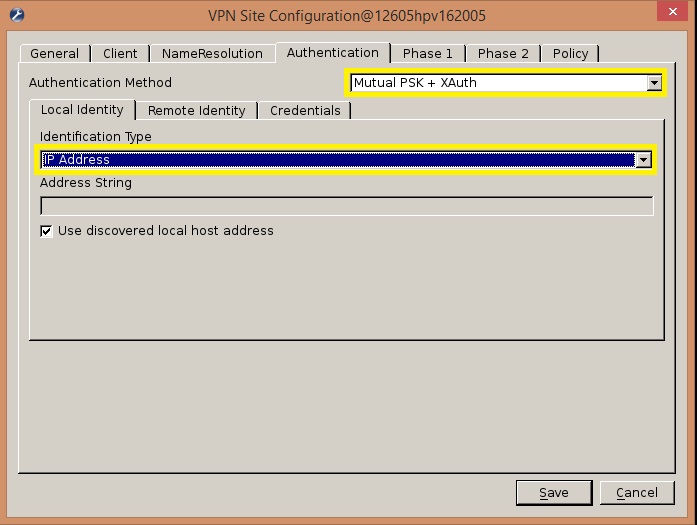
选项卡 "身份验证 "
更改 "身份验证方法 " 为 "相互的 PSK + XAuth ".
在选项卡 "本地身份 "把 "标识类型 " 对 "IP 地址 ".
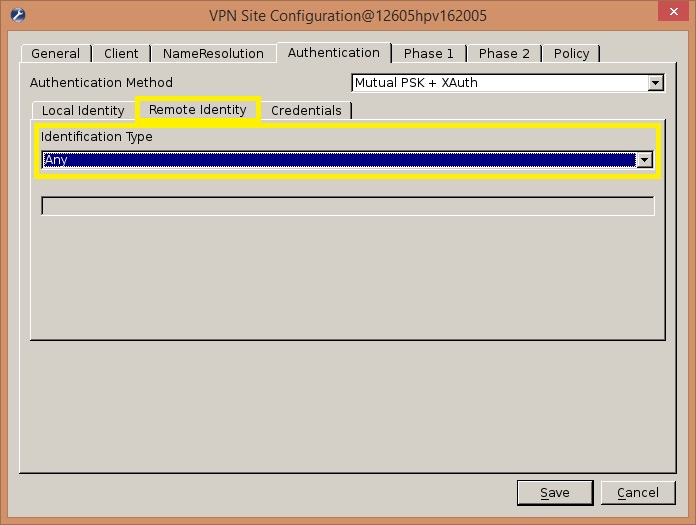
离开默认选项卡 "远程身份 ".
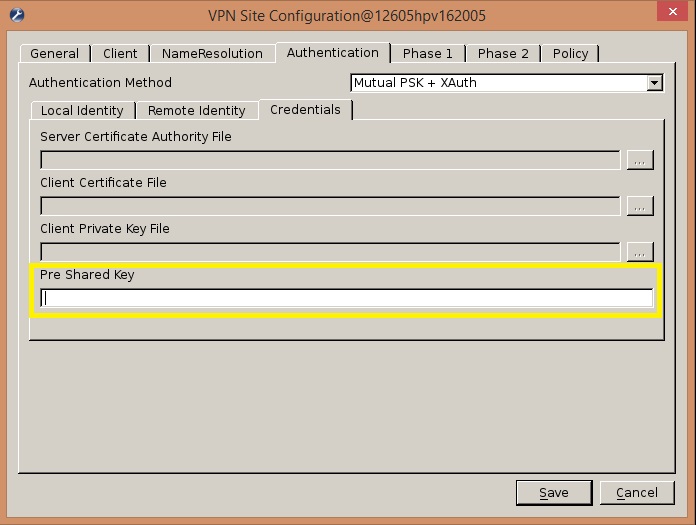
选项卡 "凭据 "
复制 /粘贴你 "预共享密钥 ".
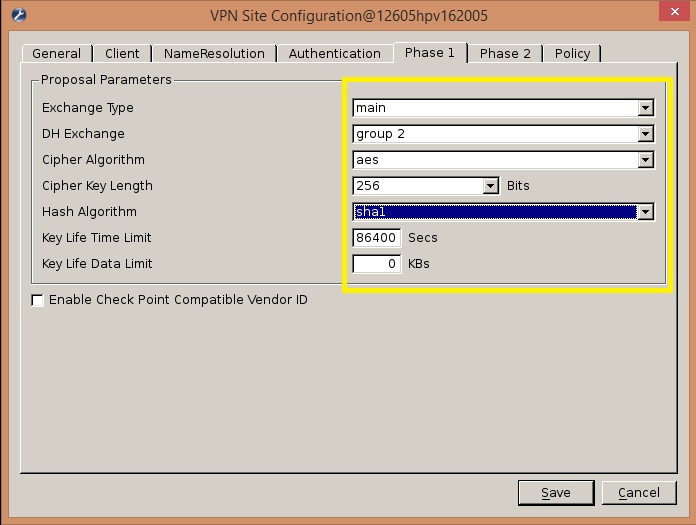
选项卡 "相 1"
填充选项卡 "相 1" 取决于您的防火墙设置。
注意,值 "交换类型 " 我们推荐那个地方 "主要 " 因为所有的防火墙不是与模式兼容 "侵略性 ".
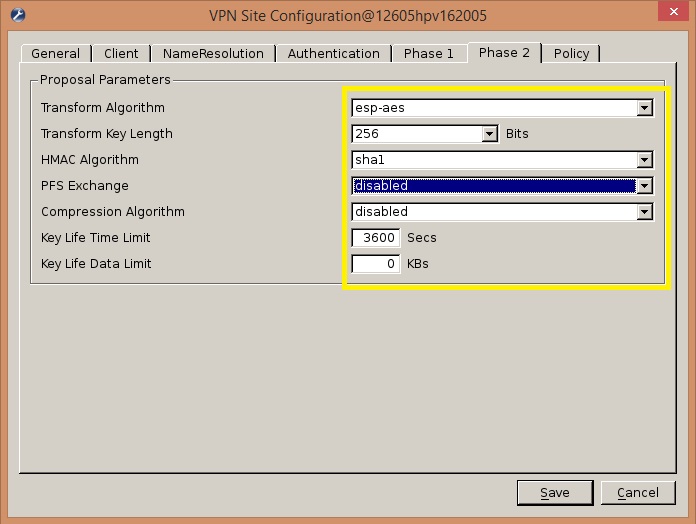
选项卡 "相 2"
同样作为为 "相 1"更改的值根据您的防火墙设置。
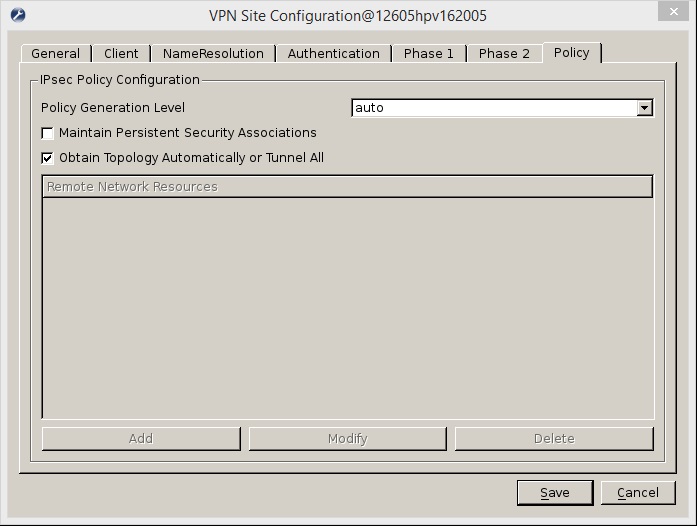
选项卡 "政策 "
让 默认情况下。
备份您的配置。
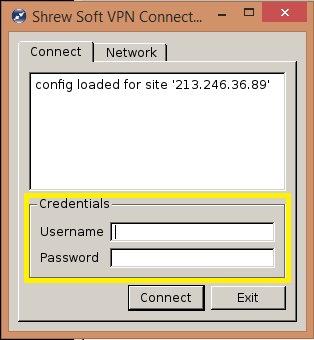
启动 VPN 并输入您的用户名和密码。
注意
注意,ShrewSoft VPN 客户端是不兼容的 VPN L2TP 在 Ipsec.
这篇文章似乎你要有用 ?
开启评论自动刷新